There are tons of tissue pom tutorials out there like here and here, plus some amazing variations found here and here! My problem was that I wanted to put some of these pom poms outside, and I was certain my kids would have their little hands all over them within two seconds of seeing them......all I could imagine was squishing and ripping and complete badness. :-(
So...I turned to tulle. It's Seattle rain proof, unrippable (is that a word?), and if when squished will bounce right back! Sounds like my kind of pom pom ball! The tutorial I am basing mine off of today comes from this site.
Even though I was super excited about using the tulle, and that was what was used for the majority of the bridal shower, I was even more excited to experiment using muslin fabric for some of the poms (this was country/vintage themed) and ended up with these:
I loved them, my sister loved them ~ we were all happy. :-)
Here is a quick tutorial for those of you new to pom poms.
It is my inexpensive, super fast and easy version.
(LOTS of pictures!)
Start by cutting out cardboard templates. You can make them whatever size you want,
and they don't have to be cut perfectly.
Cut TWO circles per size, with 1"-2" holes in the center (depending on size).
Tie whatever you are using to hang the pom pom with, like you are tying a knot,
and place it on top of one of the template circles.
Tuck your ends around the circle.
Place the other template circle on top of the template with the string/ribbon.
Cut your fabric or tulle that will wrap around the template.
I suggest cutting about 3/4 the width of the circle for smaller poms,
and 1/2 the width of the circle for larger poms.
As for length, what ever looks right (roughly 4-10 ft. depending on the size)
You can also take two colors here, place them side by side,
and wrap them at the same time for a layered effect.
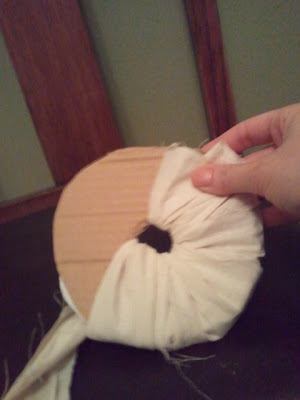
Place one end of the fabric through the center hole.
Place your thumb on the fabric to hold it down while you "thread" it around the template.
Wrap the fabric, tulle, or whatever around.....
And around.....
And around.....
OH NO! (Not really....but just in case) Your fabric wasn't long enough.
No worries....cut another one and start where you ran out!
Like this.
Finish wrapping up and trim the excess off the end.
~~~
Now for cutting.
Find an opening between your templates.
Cut the fabric around the outside edge, all the way around the template.
Be careful NOT TO CUT THE STRING!
Occasionally check where your string is and move it when necessary.
You don't want all your hard work to be gone in one snip!
YEAH! It's cut. Now the fun part.
Find the part of your string that's tied.
Cinch it down TIGHT and KNOT.
Pull the templates off from around the fabric.
Here it is...unfluffed and unpretty.
Fluff it up and give it a little haircut around the edges.
This will help to even it out if neccessary.
YOU DID IT! CONGRATULATIONS!
Here are some pictures from the poms poms at the bridal shower!
This larger one ended up being too heavy to "fluff", but I still LOVED it!
We had mixes of turquosie, silver, and white...
some were shiny mixed with matte,
and some had pretty crystals on them!
Love them!!!
FUN FOR EVERYONE!
These are truly fast, inexpensive, and impressively beautiful.
Not to mention easy to store if you'd like!
I hope you've found this helpful among the sea of so many other tutorials.
And I'd love to know if you use this and how they turned out for you!
~~~~~
Now I need to get to work in the shop so I'm switching things up a bit!
I'll be sharing some fun finds on Friday.
See you then!
~Anneke~
Proudly linking at:


